
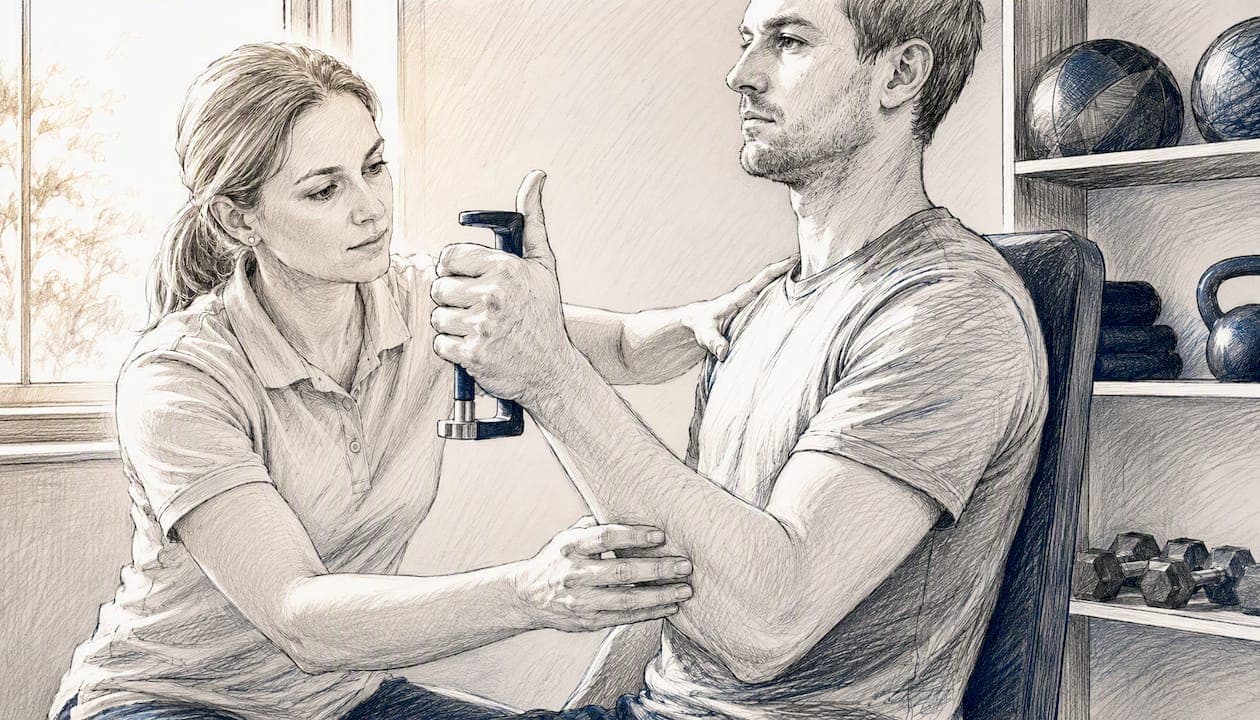
A standardized, reproducible grip-strength measurement requires three elements working together: correct patient positioning per ASHT/NHANES consensus, a consistent trial sequence with adequate rest, and documented device settings that account for inter-instrument bias. Follow these, and any well-maintained dynamometer will produce clinically defensible data.
Core protocol checklist:
- Position: Seated, spine erect, feet flat on the floor, shoulder adducted and in neutral rotation, elbow flexed to 90°, forearm neutral. The dynamometer must not contact the body or any surface during the squeeze. This positioning aligns with ASHT clinical assessment recommendations and the standardized clinical protocols summarized in the literature.
- Trials: Three maximal-effort trials per hand, alternating sides, with a 60-second rest between trials on the same hand.
- Record: Report the highest single trial or the mean of three, depending on your protocol. Document which metric you use and keep it consistent across sessions.
- Handle position: Use the standard second handle position for most adults; adjust for hand size and record the setting every time.
- Hygiene: Disinfect contact surfaces between patients.
- Calibration: Verify zero before each session; schedule annual external calibration.
Pro Tip: When comparing a patient's current results to historical data collected on a different device, apply a correction for known inter-instrument bias before drawing clinical conclusions. A systematic difference of several kilograms has been documented between some device types, which is large enough to misclassify borderline cases.
Key Takeaways
Following ASHT/NHANES-aligned positioning, three alternating trials per hand, documented device settings, and annual calibration produces grip-strength data that is clinically defensible and reproducible across sessions and clinicians.
| Point | Details |
|---|---|
| Standardized positioning | Seated, elbow at 90°, forearm neutral, dynamometer free-hanging — per ASHT/NHANES consensus. |
| Three trials, alternating sides | Administer three maximal trials per hand with 60-second rest; record highest or mean consistently. |
| Document device metadata | Record model, handle position, and firmware at every session to preserve reproducibility. |
| Account for inter-instrument bias | A systematic bias of 2.6–3.09 kg exists between some device types, with spring-type instruments underestimating grip strength compared to JAMAR hydraulic devices. Clinicians must account for this bias when comparing to reference norms and performing longitudinal tracking. |
| Dexdia for clinic-ready tracking | The DEXDIA GX provides Bluetooth data export and symmetry analysis for session-by-session grip-strength monitoring. |
Table of Contents
- What does grip strength actually measure, and why does it matter clinically?
- How to use a hand dynamometer: the standardized ASHT/NHANES protocol
- How should you choose a dynamometer for clinical practice?
- Calibration, pre-test quality checks, and routine maintenance
- What do reliability statistics mean for your grip-strength data?
- How to interpret grip-strength results using U.S. normative data
- Common testing errors and how to fix them
- Standards, methodology, and key references behind these best practices
- Why standardization is the non-negotiable foundation of grip-strength assessment
- The DEXDIA GX: a clinic-ready grip-strength assessment tool
- Sources
What does grip strength actually measure, and why does it matter clinically?
A hand dynamometer captures peak isometric force, expressed in kilograms or pounds, generated during a maximal voluntary contraction. Some digital devices also record the rate of force development (RFD), the speed at which force rises from baseline to peak.
Peak force is the workhorse metric in clinical practice. It informs sarcopenia screening, tracks rehabilitation progress, supports prehabilitation planning, and contributes to return-to-play decisions in sports medicine. Population-level datasets, most notably the NHANES normative series, give clinicians age- and sex-stratified reference values that turn a raw number into a clinical signal.
RFD adds a neuromuscular dimension, reflecting how quickly the nervous system can recruit motor units. It is useful in athletic assessment and neurological monitoring, but it demands higher sampling rates than peak force and is more sensitive to device limitations. Research on sampling frequency confirms that while peak force can be valid at approximately 100 Hz, while early-phase RFD typically requires higher sampling frequencies in the range of several hundred Hz. Bluetooth packet loss can distort rapid force metrics like RFD even when peak-force readings remain largely accurate.
Key clinical applications of grip-strength measurement:
- Sarcopenia and frailty screening in older adults
- Baseline and progress monitoring in hand and upper-extremity rehabilitation
- Prehabilitation assessment before surgery
- Return-to-sport or return-to-work clearance
- Nutritional and oncology status monitoring
How to use a hand dynamometer: the standardized ASHT/NHANES protocol
Pre-test preparation
- Obtain verbal consent and record hand dominance.
- Ask the patient to remove rings, bracelets, or any jewelry on the test hand.
- Disinfect the dynamometer handle and wrist strap.
- Confirm the device reads zero with no load applied; reset the peak-hold needle or digital peak value.
- Record the device model, firmware version, and handle position setting in the patient file.
Patient positioning
Seat the patient in a standard chair with back support. The spine should be erect, feet flat on the floor, and the shoulder adducted in neutral rotation. The elbow is flexed to 90° with the forearm in a neutral (thumb-up) position. The wrist may be in slight extension (0–30°) or neutral. The dynamometer hangs freely and must not touch the patient's body, the chair, or any surface during the contraction. This position follows ASHT clinical assessment recommendations and is consistent with NHANES-aligned standardized protocols.
Handle position
The second handle position is standard for most adults. For smaller hands, the first position may be more appropriate; for very large hands, the third position. Record the handle setting used and keep it identical across all sessions for that patient. Changing handle position between sessions introduces measurement error that cannot be corrected retrospectively. Detailed guidance on selecting the right handle position is available at best grip size for your dynamometer.
Trial sequence
- Demonstrate the test yourself so the patient understands the expected effort and duration.
- Allow 1–2 submaximal habituation trials to familiarize the patient with the device and reduce learning-effect variability. Methodological consistency research confirms that habituation trials and consistent verbal cues are among the most effective ways to reduce within-session variability.
- Administer three maximal trials per hand, alternating sides (e.g., right, left, right, left, right, left). Rest at least 60 seconds between trials on the same hand.
- Record either the highest single value or the mean of the three trials. The Southampton BRC SOP for the JAMAR dynamometer uses the highest trial; some research protocols use the mean. Choose one approach and apply it consistently.
Verbal cues
Use a standardized script: "When I say go, squeeze as hard as you can and hold it for three seconds. Ready? Go." Provide consistent encouragement during the contraction: "Squeeze, squeeze, squeeze." Avoid variable phrasing between trials, as the intensity and timing of verbal cues measurably affect peak force output.
Contraindications and modifications
- Recent hand surgery or fracture: defer testing or use a modified protocol with physician clearance.
- Acute pain or inflammation: document pain level (VAS or NRS) before and after; consider pneumatic devices, which are often more comfortable for patients with severe arthritis.
- Neurological conditions affecting grip: note spasticity, tremor, or coordination deficits; interpret results against condition-specific norms where available.
- Casts or external fixators: test the unaffected hand only and document the limitation.
Pro Tip: For patients with severe arthritis or post-surgical sensitivity, a pneumatic (vigorimeter-style) device distributes pressure more evenly across the palm and can reduce pain-induced underperformance compared with rigid hydraulic handles.
How should you choose a dynamometer for clinical practice?
Device selection shapes both the quality of your data and the feasibility of your workflow. Four main categories exist: hydraulic, mechanical spring (Smedley-type), pneumatic, and digital/Bluetooth. Each has distinct trade-offs.
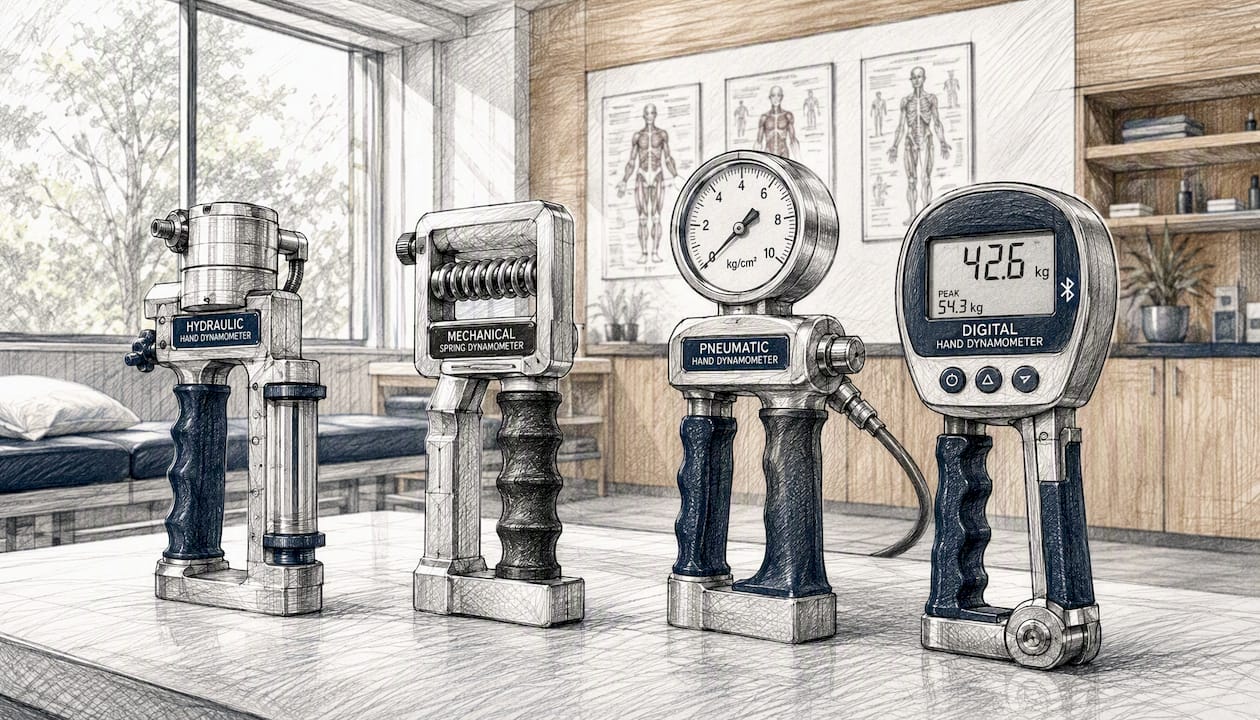
| Feature | Hydraulic | Mechanical spring | Pneumatic | Digital/Bluetooth |
|---|---|---|---|---|
| Clinical validation | Extensive (JAMAR is the reference standard) | Moderate; systematic bias documented | Moderate; preferred for arthritic hands | Varies; verify against validated reference |
| Handle adjustability | 5 positions (standard) | Fixed or limited | N/A (squeeze bulb) | Varies by model |
| Measurement range | Typically 0–90 kg | Typically 0–100 kg | Expressed in kPa | Varies by model |
| Data export | Manual read | Manual read | Manual read | Bluetooth/app integration |
| Calibration needs | Annual; send to manufacturer | Annual; prone to drift | Annual | Annual + firmware updates |
| Comfort for arthritic hands | Moderate | Lower | High | Moderate to high |
| Portability | Moderate | High | Moderate | High |
Key selection criteria for clinicians:
- Accuracy and validation: Prioritize devices with published ICC data and cross-validation against the JAMAR hydraulic standard. The SRAlab rehabilitation measures resource summarizes device-specific strengths and limitations.
- Sampling frequency: If you measure RFD, verify the device samples at 500–1000 Hz, as research suggests this frequency range is needed for accuracy. For peak force only, approximately 100 Hz is generally sufficient per published sampling-frequency research.
- Data export and connectivity: Bluetooth-enabled devices allow automated session logging, symmetry analysis, and longitudinal tracking, but clinicians should verify packet-loss specifications before relying on RFD data from wireless devices.
- Handle adjustability: Five adjustable positions are the clinical standard; fewer positions limit your ability to fit diverse hand sizes.
- Calibration and service: Confirm the manufacturer offers a documented calibration service and that replacement parts are available in the U.S.
Budgeting for a clinical dynamometer? The hand dynamometer price guide covers realistic cost ranges across device categories.
Calibration, pre-test quality checks, and routine maintenance
Reliable data depends on a device that is functioning correctly before the patient sits down. A brief pre-test check takes under two minutes and prevents the frustration of discovering a faulty reading after the session.
Pre-test checklist (every session):
- Zero the device with no load applied; confirm the display or needle reads 0.
- Reset the peak-hold value.
- Confirm the handle is secure at the selected position.
- Inspect for visible cracks, loose components, or damaged wrist strap.
- Disinfect all patient-contact surfaces and allow to dry.
Routine maintenance schedule:
| Interval | Action |
|---|---|
| After each patient | Wipe contact surfaces with an approved disinfectant; allow full dry time before next use |
| Weekly | Inspect handle locking mechanism; check for fluid leaks (hydraulic models) |
| Quarterly | Perform a stable-load functional check using a known reference weight; log the result |
| Annually | Send for external calibration by the manufacturer or an accredited metrology lab; document the certificate |
| After any drop or impact | Remove from service; perform functional check before returning to use |
The Southampton BRC SOP recommends annual calibration as a minimum, with more frequent checks if the device is transported regularly or used in high-volume settings.
A simple in-clinic stable-load test: hang a calibrated weight (e.g., a 10 kg dumbbell with a verified mass) from the handle and record the reading three times. If the mean deviates from the known mass by more than 2%, remove the device from service and arrange calibration. Document all QC results in a dedicated log, and note the device serial number, handle position tested, and the technician's name.
What do reliability statistics mean for your grip-strength data?
ICC, SEM, and MDC thresholds
Intraclass correlation coefficients (ICC) quantify test-retest and inter-rater reliability. An ICC above 0.90 is generally considered excellent for clinical measurement; values of 0.75–0.90 are typically seen as good. Most well-maintained hydraulic dynamometers tested under standardized conditions achieve ICC values in the excellent range. The standard error of measurement (SEM) and the minimal detectable change (MDC) translate reliability into clinically interpretable units.
The minimal detectable change (MDC) can be calculated from the standard error of measurement (SEM) using the formula: MDC = SEM × 1.96 × √2.
At the 95% confidence level, changes smaller than the MDC may not be distinguishable from measurement noise. For grip strength, Reported MDC values generally range from about 2 to 5 kg depending on device type and population, but clinicians are advised to estimate device- and population-specific values from their own data.
Inter-instrument bias
This bias is not random error; it is systematic and device-specific. Smedley-type spring dynamometers, for example, have documented patterns of underestimation relative to hydraulic devices. Pneumatic devices produce values in different units (kPa) and require separate normative references.
| Device comparison | Reported bias | Practical implication |
|---|---|---|
| Some spring-type vs. JAMAR hydraulic | 2.6–3.09 kg underestimation | Apply device-specific correction or use within-device norms |
| Pneumatic (vigorimeter) vs. hydraulic | Different units (kPa vs. kg) | Use vigorimeter-specific normative tables |
| Digital/Bluetooth vs. hydraulic | Varies; verify with published cross-validation | Confirm ICC and bias data before applying NHANES norms |
Practical rules for managing inter-instrument bias:
- Use the same device for all sessions within a patient's episode of care.
- When switching devices, perform a parallel measurement session on at least 10 patients to estimate local bias.
- Report the device type and model in every clinical note and research record.
- Apply published correction offsets cautiously; systematic bias between device types has been documented, with some spring-type dynamometers underestimating grip strength by 2.6–3.09 kg compared to JAMAR hydraulic devices. Clinicians must account for this device-specific bias when applying normative data.
Pro Tip: Tethering the dynamometer to a fixed frame or using an external fixation bracket eliminates tester-strength as a confounder in hand-held setups. This is especially relevant when testing patients with very high grip strength, where a weaker tester may inadvertently allow device movement and underestimate true force output.
How to interpret grip-strength results using U.S. normative data
Choosing the right normative dataset
The NHANES dataset is the primary U.S. population reference for grip strength, stratified by age, sex, and body size. Before applying any normative table, confirm that your test protocol and device type match those used to generate the norms. Applying NHANES values to data collected with a spring-type device without correcting for inter-instrument bias will systematically misclassify patients. Cross-sectional population studies illustrate how normative distributions shift across age and sex groups, reinforcing the need for protocol-matched comparisons.
Grip strength is also a meaningful health indicator beyond musculoskeletal function. Evidence linking it to broader health outcomes is summarized at is grip strength an indicator of health.
Sample U.S. normative reference values (NHANES-derived, dominant hand, kg)
| Age group | Males (mean ± SD) | Females (mean ± SD) |
|---|---|---|
| 20 years | approximately 45 kg | approximately 28 kg |
| 40 years | approximately 45 kg | approximately 28 kg |
| 60 years | approximately 38 kg | approximately 24 kg |
| 70 years | approximately 32 kg | approximately 20 kg |
These values are approximate reference ranges for orientation. Always consult the primary NHANES publication and match your device and protocol before applying norms clinically. Downloadable normative charts are available at grip strength norms by age.
Asymmetry and MDC interpretation
A left-to-right asymmetry exceeding 10% in the dominant-to-non-dominant direction warrants documentation and clinical investigation, particularly in the absence of a known injury. Asymmetry above 15–20% is a common threshold for flagging in return-to-sport contexts.
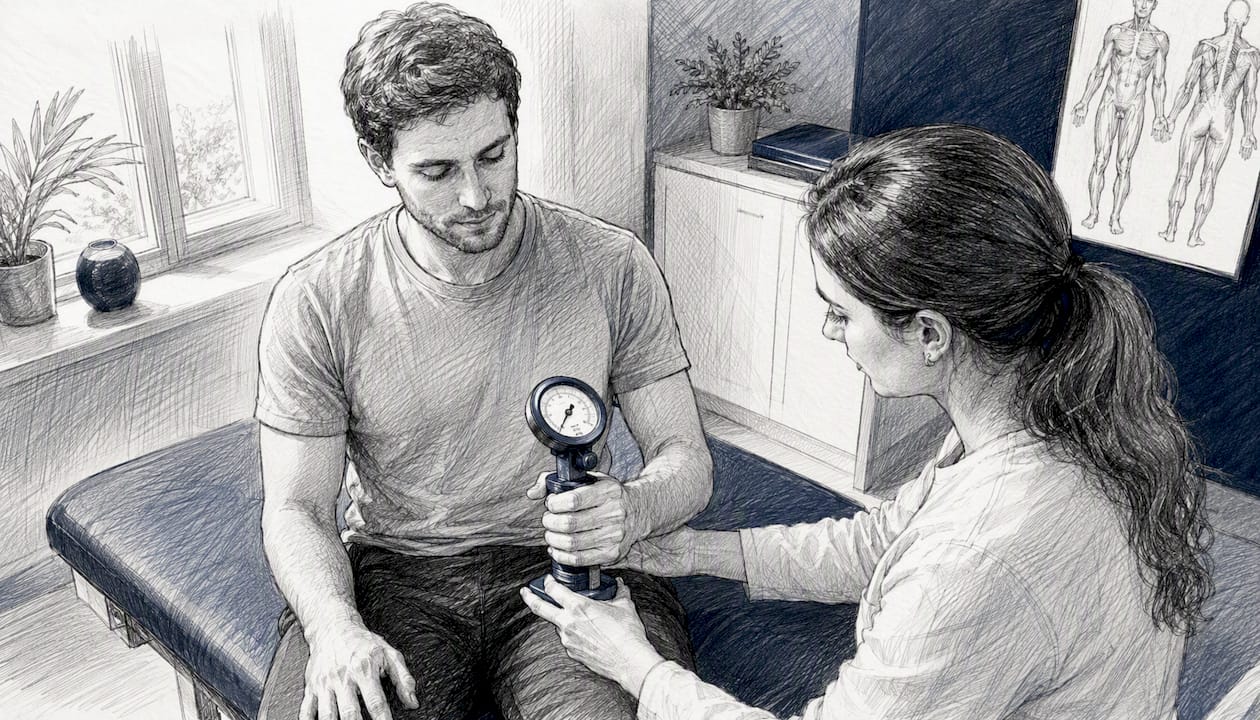
For tracking change over time, compare the observed difference to the device-specific MDC. A change smaller than the MDC is within measurement noise. A change exceeding the MDC at the 95% confidence level represents a real shift in grip capacity. Use the grip strength calculator to compare patient values against age- and sex-matched norms and generate printable reports.
Common testing errors and how to fix them
Even experienced clinicians encounter protocol drift. These are the most frequent errors and their immediate corrections.
Common errors and fixes:
- Inconsistent arm support: The elbow must be unsupported and free-hanging at 90°. Resting the forearm on the thigh or armrest changes the muscle length-tension relationship and inflates readings.
- Incorrect handle position: A handle set too wide or too narrow reduces force output. Confirm the setting matches the patient's recorded handle position at every session.
- Tester-applied force: The clinician must hold the device only to prevent it from falling, not to resist the patient's squeeze. Use a wrist strap and, where possible, a fixation bracket.
- Patient bracing: Watch for the patient pressing the elbow into the torso, lifting the shoulder, or leaning forward. Cue them to maintain the standard position throughout the contraction.
- Bluetooth packet loss: If a digital device shows irregular force-time curves or missing data points, check the wireless connection and device battery. For peak-force testing, instruct the patient to hold the contraction for at least 2–3 seconds to ensure the peak is captured even if early-phase data is incomplete.
- Failure to reset peak-hold: Always reset between trials. A carryover reading from the previous trial will inflate the recorded value.
Quick clinic checklist (print and post at the testing station):
- Device zeroed and peak-hold reset
- Handle position confirmed and recorded
- Patient seated, feet flat, elbow at 90°, dynamometer free-hanging
- Jewelry removed
- Habituation trials completed
- Three maximal trials per hand, alternating sides, 60-second rest between same-hand trials
- Highest or mean value recorded per protocol
- Device disinfected after session
- Device model and handle setting documented in patient record
Standards, methodology, and key references behind these best practices
The protocol described in this article draws on the following principal sources. Clinicians who want to audit or adapt the procedures should consult these directly.
Protocol and positioning: ASHT clinical assessment recommendations; Sensors (MDPI) standardized clinical protocols; Southampton BRC JAMAR SOP.
Reliability and inter-instrument bias: PMC: Measurement and Interpretation of Handgrip Strength; Archives of Physiotherapy: methodological consistency.
Normative data and interpretation: PMC: cross-sectional grip-strength norms; SRAlab rehabilitation measures.
Sampling frequency and RFD: PLOS ONE: sampling frequency and force-time measurement. For clinicians working with athletes who require RFD assessment, a practical overview of rate of force development provides useful applied context.
Why standardization is the non-negotiable foundation of grip-strength assessment
The strongest argument for rigorous hand dynamometer best practices is not academic. It is practical: a measurement that cannot be reproduced is a measurement that cannot be trusted. Clinicians who skip habituation trials, vary their verbal cues, or fail to document handle position are not saving time. They are generating data that looks precise but cannot support a meaningful clinical decision.
The inter-instrument bias finding is the most underappreciated issue in everyday clinical practice. A 2.6–3.09 kg systematic difference between device types is not a rounding error. For a 70-year-old woman with borderline grip strength, that gap can determine whether she screens positive for sarcopenia or not. The solution is not to avoid digital or Bluetooth devices; it is to know your device's bias profile, use it consistently, and apply norms that match your measurement conditions.
Device transparency matters equally. Recording the model, firmware version, and handle position in every patient note takes seconds. It allows any clinician who sees that patient in the future to replicate the measurement conditions exactly, which is the only way longitudinal tracking retains clinical meaning. The field has moved toward minimum reporting standards for exactly this reason, and clinics that adopt them now will be ahead of the curve when those standards become routine expectations.
The DEXDIA GX: a clinic-ready grip-strength assessment tool
Clinicians who want the data-export and longitudinal-tracking capabilities described in this guide without building a custom spreadsheet workflow have a direct option in the DEXDIA GX. The device connects via Bluetooth to a companion app that logs each session automatically, calculates left-to-right symmetry, and generates reports aligned with the comparison dimensions covered earlier: connectivity, data export, and session-by-session tracking.
The DEXDIA GX is designed for performance assessment and is not a regulated medical device, making it well-suited for physical therapists, kinesiologists, and sports medicine professionals who need a reliable, portable tool for grip-strength monitoring rather than a clinical diagnostic instrument. Handle adjustability and calibration procedures follow manufacturer guidance, and the companion app gives access to research-backed normative data and an interactive grip strength calculator for instant patient comparisons. Clinicians can review full device specifications and intended-use context at the DEXDIA GX product page.
This article provides general clinical guidance and does not constitute medical advice. Clinicians should verify current standards with ASHT, NHANES, and relevant professional bodies before implementing any protocol change.
Sources
- Sensors (MDPI) — standardized clinical protocols summary
- Archives of Physiotherapy — methodological consistency and protocol recommendations
- Procedure for measuring gripstrength using the JAMAR dynamometer (Southampton BRC SOP)
- Measurement of hand grip strength: A cross-sectional study of ... - PMC
- ASHT clinical assessment recommendations
- SRAlab — Rehabilitation measures: hand-held dynamometer grip strength
- PLOS ONE — sampling frequency and force-time measurement considerations