
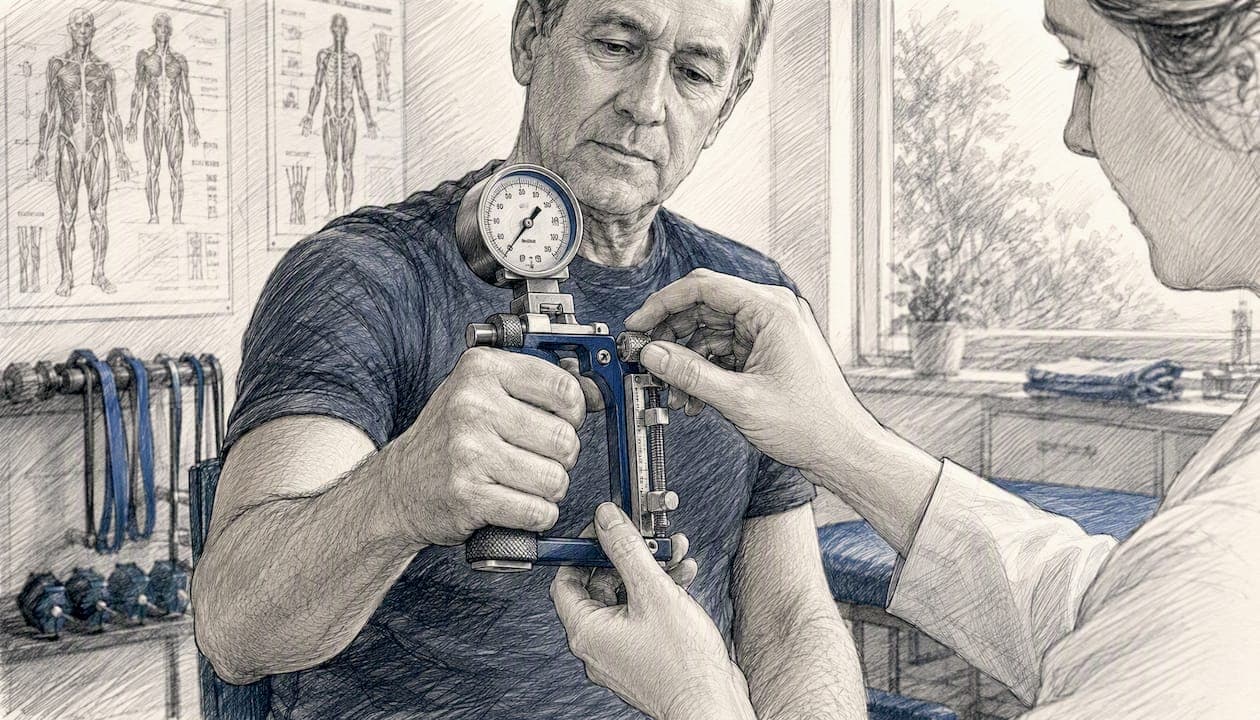
Three maximal trials per hand, 60 seconds of rest between trials on the same hand, standardized handle and body position, alternating sides, and a recorded mean per hand plus asymmetry ratio. That is the complete protocol. Everything else in this guide explains why each element matters and how to apply it reliably with clients who have diabetes.
Quick-start checklist:
- Set the dynamometer handle so the second joint of the index finger sits at approximately 90°
- Seat the client with back, pelvis, and knees at ~90°; shoulder adducted; elbow flexed at 90°; forearm neutral; wrist 0–15° ulnar deviation
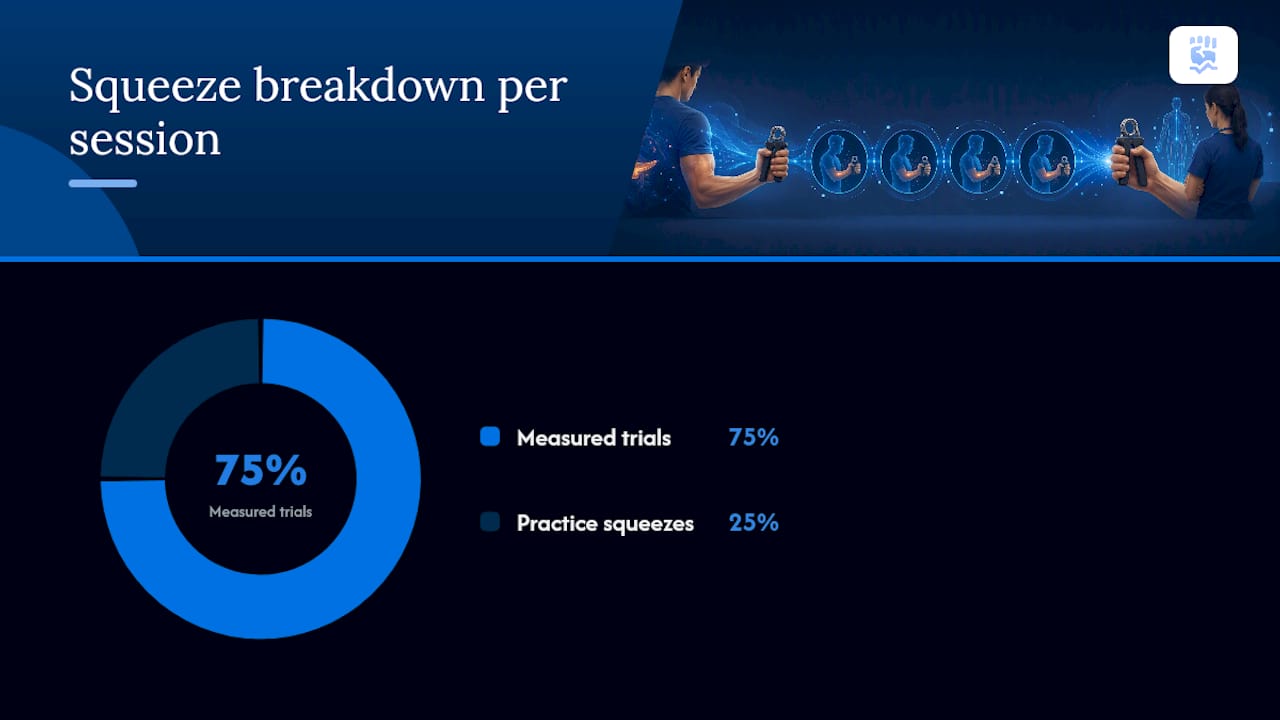
- Perform one sub-maximal practice squeeze per hand before testing
- Alternate hands: perform three trials on each hand in an alternating sequence.
- Rest an interval between trials on the same hand allowing neuromuscular recovery.
- Hold each maximal contraction for a brief period to register maximum force.
- Record the mean of three trials per hand and calculate the asymmetry ratio (stronger ÷ weaker)
Chart note template: "HGS tested per standardized protocol: 3 trials/hand, 60 s rest, alternating sides, seated 90°/90°. Mean R: ___ kg, Mean L: ___ kg, Asymmetry ratio: ___."
Key Takeaways
Consistent protocol execution, not device precision alone, determines whether grip strength data is usable for longitudinal monitoring in clients with diabetes.
| Point | Details |
|---|---|
| Three trials, 60 s rest | Perform three maximal trials per hand, alternating sides, with 60 seconds of rest between same-hand trials. |
| Standardized position | Seated 90°/90°, shoulder adducted, elbow at 90°, wrist neutral; record handle position every session. |
| Record mean, not peak | Calculate the mean of three trials per hand as the primary metric for session-to-session comparison. |
| Asymmetry ratio >1.10 | Divide stronger mean by weaker mean; a ratio above 1.10 is a monitoring trigger worth investigating. |
| Dexdia GX for tracking | The DEXDIA GX provides adjustable handle locking, peak-hold display, and app-based symmetry logging for repeatable clinical and field testing. |
Table of Contents
- Why does diabetes and grip strength measurement require strict protocol?
- Step-by-step testing protocol for clinic and athletic settings
- How to calculate and interpret grip strength asymmetry
- When should you adapt testing positions for sport-specific demands?
- Common pitfalls that invalidate longitudinal grip-strength tracking
- Best practices for logging results and detecting meaningful change
- Safety checks and red flags for clients with diabetes
- What practitioners often get wrong about this protocol
- The DEXDIA GX for repeatable testing and integrated tracking
- Sources
Why does diabetes and grip strength measurement require strict protocol?
Protocol variance is the single largest source of error in longitudinal grip-strength tracking. A different handle setting, a slightly different arm angle, or inconsistent verbal encouragement across sessions can shift absolute handgrip strength (HGS) values enough to mask real change or manufacture false progress. For clients with diabetes, where muscle function may decline gradually due to peripheral neuropathy or sarcopenia, that noise is clinically costly.
A systematic review of HGS protocols found that studies controlling fewer protocol items consistently reported higher HGS values, meaning the measurement itself changes depending on how you run the test. That is not a small methodological footnote. It means two sessions conducted with different handle positions are not comparable, regardless of how precise the device is.
Protocol heterogeneity is the primary reason longitudinal HGS data fails. Studies that controlled fewer protocol variables reported systematically higher grip values, making cross-session comparisons unreliable.
RehabMeasures specifies that maximum grip is the mean of three trials, with the client seated at 90°/90°, shoulder adducted, and wrist in neutral. The UCF Health Professions protocol adds the 60-second rest interval as the standard for neuromuscular recovery between trials. Together, these two sources define the floor for any protocol worth repeating.
Step-by-step testing protocol for clinic and athletic settings
Use this exact sequence every session. Deviating from any step breaks longitudinal comparability.
Device and handle setup
- Calibrate the dynamometer before the first session of the day
- Set the handle so the second joint (proximal interphalangeal joint) of the index finger rests at approximately 90° of flexion; record the handle position number
- Lock or note the setting so it is reproduced at every subsequent session; for guidance on matching handle size to hand dimensions, see best grip size for your dynamometer
Client positioning
- Seat the client upright, back and pelvis against the chair, hips and knees at ~90°
- Shoulder adducted and neutrally rotated, elbow flexed at 90°, forearm in neutral, wrist 0–15° ulnar deviation per the RehabMeasures standard
- The dynamometer hangs freely; the client does not rest the device against the thigh
Practice and testing order
- Instruct one sub-maximal practice squeeze per hand (approximately 50% effort) to reduce learning effects
- Alternate hands for all trials: R1 → L1 → R2 → L2 → R3 → L3
- Allow 60 seconds of rest between trials on the same hand, per UCF guidance
- Each contraction lasts 3 seconds; use a consistent verbal cue ("squeeze as hard as you can, now")
Recording
- Read the peak-hold display after each trial; record all three values per hand
- Calculate the mean of three trials per hand as the primary metric
- Record handle position, body position, and session context (time of day, fatigue level)
The JAMAR SOP confirms this alternating-sides approach and three-measurement standard as the accepted procedure for clinical HGS assessment.
Pro Tip: Use identical verbal encouragement phrasing at every session. Motivational variation can alter output by several kilograms, which is large enough to mimic or conceal real strength change.
Session checklist (paste into records):
- Handle position confirmed and recorded
- Client seated at 90°/90°, shoulder adducted, wrist neutral
- Practice squeeze completed
- Trials alternated: R1-L1-R2-L2-R3-L3
- 60 s rest between same-hand trials
- Mean per hand calculated
- Asymmetry ratio calculated
How to calculate and interpret grip strength asymmetry
The asymmetry ratio is straightforward: divide the stronger hand's mean by the weaker hand's mean. A ratio above 1.10 classifies the client as asymmetrical and serves as a monitoring trigger.
Formula: Asymmetry ratio = Mean (stronger hand) ÷ Mean (weaker hand)
Worked example:
- Right hand mean: 38.4 kg
- Left hand mean: 33.6 kg
- Ratio: 38.4 ÷ 33.6 = 1.14 → asymmetrical (>1.10)
A cohort study of 9,403 participants found that individuals with an asymmetry ratio above 1.10 had significantly higher odds for sarcopenia. For practitioners monitoring clients with diabetes, that threshold is a practical flag worth tracking across sessions, not a diagnosis.
| Metric | What to record | Monitoring trigger |
|---|---|---|
| Mean R (kg) | Mean of 3 trials, right hand | Decline >2 kg session-to-session |
| Mean L (kg) | Mean of 3 trials, left hand | Decline >2 kg session-to-session |
| Asymmetry ratio | Stronger ÷ weaker | >1.10 warrants investigation |
| Session context | Time of day, fatigue, medications | Flag if context differs from baseline |
For session-to-session comparisons, a sufficiently large change in the mean measurement can indicate meaningful change beyond measurement error. Smaller changes should be interpreted cautiously unless they persist across two or more consecutive sessions. A preliminary reliability study found High intraclass correlation coefficient values indicate good reliability for HGS measurements. in standardized conditions, though asymmetry reliability showed more variability, reinforcing the value of the practice squeeze and consistent posture.
Pro Tip: When presenting asymmetry data in athlete reports, show the ratio trend over time alongside absolute values. A ratio creeping from 1.05 to 1.14 over three months is more informative than a single session snapshot, and it prompts earlier investigation of neural signs or unilateral loading patterns.

When should you adapt testing positions for sport-specific demands?
The standard seated protocol is the baseline. Add one or two sport-specific positions only when the athlete's performance demands require grip assessment in a posture the standard test does not replicate.
- Overhead athletes (throwers, volleyball, tennis): Test with the arm elevated to approximately 90° of shoulder flexion or abduction, elbow extended. Use three trials per position, same 60-second rest. Document the position precisely. Research on grip testing protocols notes that many clinicians use both at-side and overhead positions for overhead athletes, and that standing tests can yield slightly higher values than seated, so never mix positions across sessions without documenting the change.
- Climbers and gymnasts: Test with the arm extended forward at shoulder height, elbow straight. This position stresses the forearm flexors under a different mechanical load than the standard 90° elbow position. Three trials, 60 s rest, record separately from the standard baseline.
- Throwers and racket sport athletes: Consider testing at multiple elbow angles (90° and 120°) to capture the range where grip force is produced during the sport action.
Every adapted position must be recorded with the same specificity as the standard: handle setting, exact arm position, number of trials, rest interval. Reproducing the position identically at the next session is what makes the data usable. Combining grip monitoring with other performance metrics, such as reactive strength index testing, can give a fuller picture of neuromuscular readiness across sessions.
Common pitfalls that invalidate longitudinal grip-strength tracking
Most measurement error is preventable with consistent device setup, body position, and testing cadence. Standardization research confirms that the absence of a fixed protocol is the primary reason longitudinal HGS data becomes scientifically invalid.
- Wrong handle position: Fix by recording the handle number at session one and reproducing it every time
- Inconsistent arm or body posture: Fix by using a positioning checklist before every trial
- Variable verbal encouragement: Fix by scripting the cue and using the same phrase every session
- Insufficient rest: Fix by timing 60 seconds with a stopwatch, not by feel
- Mixing devices across sessions: Fix by assigning one device per client and noting the serial number in the record
- Recording peak instead of mean: Fix by calculating and recording the mean of three trials as the primary value; peak-hold is a reading aid, not the final metric
- Failing to alternate hands: Fix by following the R1-L1-R2-L2-R3-L3 sequence every session without exception
Best practices for logging results and detecting meaningful change
Record these fields at every session: device model and serial number, handle position setting, body position used, number of trials per hand, rest interval, mean per hand (kg), asymmetry ratio, and session context (time of day, reported fatigue, recent training load, medication timing for clients with diabetes).
Minimum logging fields (copy to EHR or spreadsheet):
- Date and time
- Device model / serial number
- Handle position (number or cm)
- Body position (standard seated / adapted)
- Trial values: R1, R2, R3, L1, L2, L3
- Mean R, Mean L
- Asymmetry ratio
- Session context notes
A change of approximately 2 kg in the mean across two consecutive sessions, under identical conditions, is a practical threshold for flagging real change versus measurement noise. Single-session drops should be noted but not acted on until confirmed at the next test. For timing and frequency guidance, testing every 4–6 weeks during a training block gives enough data points to distinguish trend from variability.
Pro Tip: Schedule retests at the same time of day and at the same point in the training week. Grip strength fluctuates with fatigue and circadian rhythm; controlling test timing removes one more source of noise from your trend data.
Safety checks and red flags for clients with diabetes
Stop or modify testing if the client reports pain, has open wounds or active skin breakdown on the hand, shows signs of acute neuropathic symptoms (burning, numbness, or tingling that is new or worsening), or presents with an acute unstable medical condition. These are not diagnostic criteria; they are safety gates for a performance assessment.
Pre-test screening questions:
- Any pain, numbness, or tingling in the hands or fingers since the last session?
- Any wounds, blisters, or skin breakdown on the hands?
- Any recent changes in sensation or hand function?
- Any acute illness or significant change in blood glucose management?
Observable red flags to record before testing:
- Visible wounds, calluses with open edges, or skin fragility
- Reduced or absent sensation on light touch to the palm or fingertips
- Asymmetric hand temperature or color changes
- Grip weakness that is new, rapid, or unilateral without a mechanical explanation
Referral guidance: Pause testing and refer for medical evaluation if the client reports unexplained new weakness, progressive sensory loss, or pain that limits full hand closure. These findings fall outside the scope of performance monitoring and warrant physician or hand specialist assessment before testing resumes. This article provides general performance-monitoring guidance, not medical advice; confirm clinical decisions with the appropriate licensed professional.
What practitioners often get wrong about this protocol
The protocol described here is not complicated, but it is precise. The gap between "we do grip testing" and "we do grip testing that produces comparable data across sessions" is almost entirely a documentation problem, not a skill problem.
Practitioners working with athletes who have diabetes often focus on the absolute strength number and overlook the asymmetry ratio. A client whose bilateral strength is declining symmetrically may look stable on a single-hand reading. The ratio catches what the absolute value misses. Integrating the asymmetry calculation into every session, not just periodic reviews, is the single highest-leverage change most clinics can make to their current workflow. The time cost is under 30 seconds per session.
The DEXDIA GX for repeatable testing and integrated tracking
For clinicians who need documented, repeatable HGS testing with built-in symmetry analytics, the DEXDIA GX is the practical choice. Its adjustable handle locks to a recorded position, the peak-hold display captures each trial cleanly, and Bluetooth export to the companion app logs mean values and asymmetry ratios automatically across sessions.
Three workflows where the DEXDIA GX fits directly:
- Clinic: Therapist runs the standard protocol, app logs all six trial values, calculates mean and ratio, and exports a session report
- Field / sideline: Athlete self-tests with the app guiding trial timing and rest intervals; data syncs to the practitioner's dashboard
- Athlete self-monitoring: Between clinic visits, athletes track bilateral strength at home; the app flags asymmetry above 1.10 automatically
Use the Grip Strength Calculator to compute asymmetry ratios and compare results against normative data by age. Both tools are free and work alongside the DEXDIA GX or as standalone references. Visit the DEXDIA GX product page to review device specifications and place an order.
Sources
- Grip testing instructions for older adults (UCF Health Professions)
- Procedure for measuring hand grip strength using the JAMAR dynamometer (BRC SOP adapted)
- Hand-held dynamometer / Grip strength | RehabMeasures Database (SRALab)
- Handgrip strength asymmetry as a new biomarker for sarcopenia and individual sarcopenia signatures (PMC)
- Publication highlighting the importance of standardization in handgrip testing (PubMed entry)
This article is general information, not a substitute for advice from a qualified doctor. Consult a qualified healthcare professional about your own circumstances before acting on anything here.