
Prioritize climbing-specific finger training over general grip work. The fastest, safest path to stronger climbing grip strength combines edge hangs, progressive load increases, and regular testing to confirm the work is paying off. General handgrip devices and pull-ups matter less than climbing-specific finger strength testing, which shows a much stronger link to actual bouldering and redpoint performance.
Start this week with these four moves:
- Warm up fingers and shoulders for 8 to 10 minutes before any hangboard work.
- Run a baseline test: a 7 to 10 second dead hang on a 20mm edge, half-crimp grip, bodyweight only.
- Pick one protocol (max hangs or low-intensity long holds) and stick with it for at least four weeks before switching.
- Log every session (hold size, added weight, hang time, soreness) so you can see whether the training is working.
This approach works because it matches the load to the tissue that actually limits climbing: your finger flexors and tendons, not your forearms or crushing power.
Key Takeaways
Climbing-specific edge testing and progressive, mixed-intensity hangboard protocols build grip strength faster and safer than general grip training alone.
| Point | Details |
|---|---|
| Test on an edge, not a squeeze gauge | A 20 to 23mm edge hang predicts climbing performance far better than general handgrip tests. |
| Prioritize half-crimp | Half-crimp strength alone explains up to 58% of variance in bouldering grade. |
| Combine intensities | Pairing low-intensity Abrahangs-style loading with maximal hangs produces additive strength gains. |
| Progress load conservatively | Add no more than 5% load or 1 to 2 seconds of hang time per week to protect tendons. |
| Measure objectively | The DEXDIA GX dynamometer tracks strength, symmetry, and progress against research-backed norms across training blocks. |
Table of Contents
- Main Methods To Train Climbing Grip Strength
- Which Grip Positions Matter Most For Climbing?
- How Do You Test Climbing-Specific Grip Strength?
- How Do You Progressively Overload Grip Strength?
- What Do 8 to 12 Week Grip Training Programs Look Like?
- Which Warm-Up And Grip Exercises Actually Help?
- How Do You Prevent Finger Pulley Injuries?
- What Does The Research Actually Support?
- How Does Nutrition Support Grip Strength Gains?
- Track Your Grip Progress With The DEXDIA GX
- Selected Research And Practical Reading
- Frequently Asked Questions
- Sources
Main Methods To Train Climbing Grip Strength
Five distinct methods build climbing grip strength, and each transfers differently to actual routes.
Hangboarding is the most direct method. A 10-week hangboard training study found that climbers who added structured hangboard sessions to their normal climbing gained 17 to 28% in several peak and average force metrics compared with climbers who only climbed. Max hangs, repeaters, and low-intensity holds all fall under this category, and each targets a slightly different quality (raw strength, endurance, or tendon resilience).
Climbing itself builds skill and forearm endurance that no hangboard session replicates. Route reading, body positioning, and the neural coordination of gripping under fatigue only improve through actual movement on holds.
Campus boarding develops rate of force development and explosive power. It's the highest-risk method on this list and belongs only in a program built on a solid strength base.
Weighted pulling and grip-sport work (farmer carries, pinch blocks, wrist curls) build the surrounding musculature that stabilizes the hand and forearm during long sessions.
Pro Tip: Don't chase every method at once. Pick one primary stimulus per training block (usually hangboarding) and treat climbing and supplemental work as support, not competition for recovery.
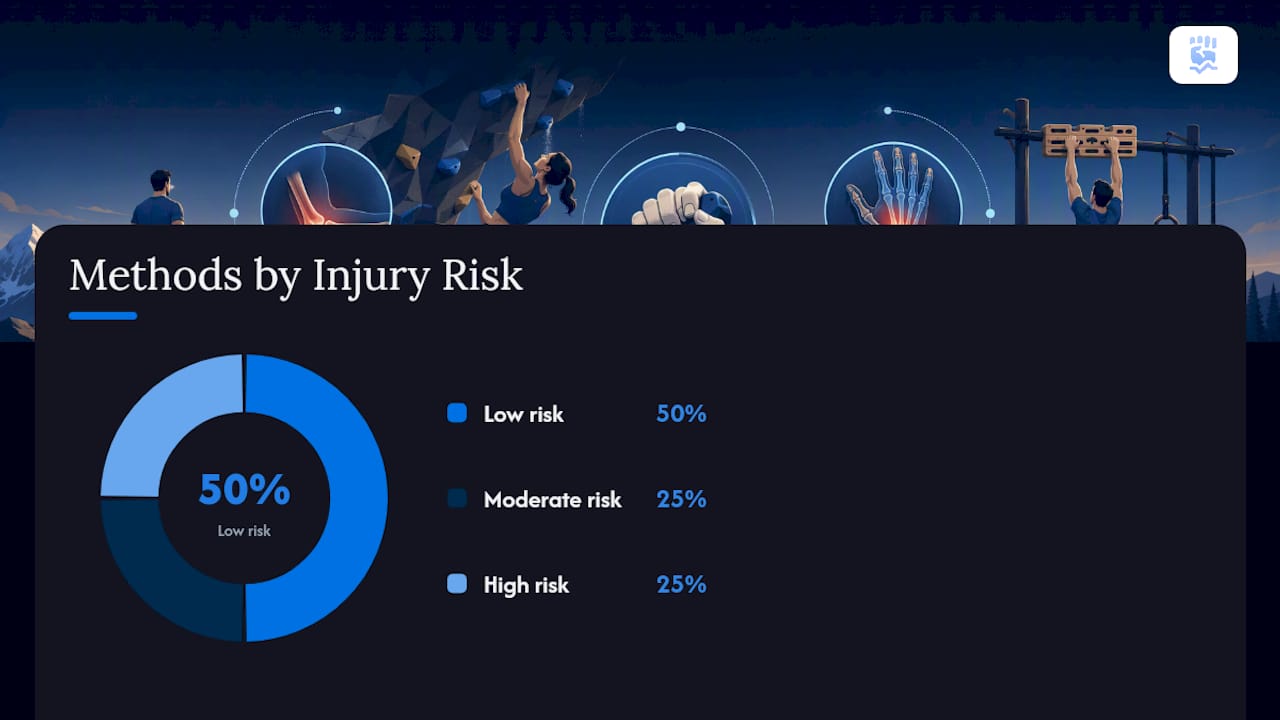
| Method | Best for | Injury risk |
|---|---|---|
| Hangboarding | Max strength, tendon loading | Moderate |
| Climbing | Endurance, skill, coordination | Low |
| Campus board | Power, RFD | High |
| Weighted pulls / grip sport | Supplemental strength | Low |
Equipment needs are modest: a hangboard, a timer or hangboard app, a weight belt or backpack for added load, and ideally a dynamometer to catch strength asymmetries a hangboard session alone won't reveal.
Which Grip Positions Matter Most For Climbing?
Half-crimp deserves the most training attention. Testing across six grip techniques found half-crimp strength alone explained 48% to 58% of the variance in bouldering grade, and combining it with front-3-drag increased predictive power further.
Each grip type appears in different climbing situations:
- Half-crimp: the default position for most edges and pockets; flat wrist, moderate knuckle flexion.
- Full crimp: hyperextended fingertip joint, used on the smallest holds; produces the most force but the most joint stress.
- Open-hand: fingers extended, used on rounded edges and slopers; lowest tendon stress.
- Pinch: thumb opposed against fingers, used on volumes and pinches.
- Sloper: friction-dependent open-hand variation with no positive edge to grip.
| Grip type | Typical use | Relative injury risk |
|---|---|---|
| Half-crimp | Edges, pockets | Moderate |
| Full crimp | Small crimps | High |
| Open-hand | Slopers, rounded edges | Low |
| Pinch | Volumes, pinches | Low to moderate |
Full crimp mechanics place the A2, A3, and A4 finger pulleys at the highest injury risk of any grip position, so train it sparingly and only after a base of half-crimp and open-hand strength is established.
Pro Tip: Build your hangboard sessions around half-crimp and open-hand work, and treat full crimp as an occasional, low-volume addition rather than a daily habit.
How Do You Test Climbing-Specific Grip Strength?
A dead hang on a 20mm to 23mm edge, held in half-crimp with a controlled body position, gives a far more useful number than a squeeze on a general handgrip dynamometer. Climbing-specific finger strength on a small edge correlates strongly with bouldering performance (r = 0.89) and redpoint performance (r = 0.67), while general handgrip and pull-up strength track much less closely with actual climbing ability.
Run the test this way:
- Warm up for 8 to 10 minutes with light hangs and mobility work.
- Hang on the target edge in half-crimp for a maximum of 7 to 10 seconds, feet either on the ground for assistance or fully hanging.
- Rest 3 to 5 minutes and repeat once to confirm the result.
- Retest the same edge, same grip, same time of day every 3 to 4 weeks.
A hangboard paired with a timer app tells you hang duration and added weight. A dynamometer like the DEXDIA GX adds a general strength baseline and flags left/right asymmetries that a hangboard session can't show on its own.
Record these fields every session: date, body mass, edge size, grip type, added or assisted weight, hang time, perceived exertion, and any pain or soreness. If half-crimp numbers stall but open-hand keeps climbing, bias your next block toward crimp strength; if hang time falls apart before force does, the deficit is endurance, not max strength.
How Do You Progressively Overload Grip Strength?
Fingers and tendons adapt more slowly than muscle, so progression has to be conservative and consistent. Three principles govern every protocol below: train the grip position you actually use on the wall, increase load or duration in small increments, and give tendons more recovery time than the surrounding muscle needs.
The main protocol families:
- Max Hangs (MH): short holds (7 to 10 seconds) at 80% to 95% of one-rep max load, aimed at raw strength.
- Hang Weight (HW): load increases week to week on a fixed hang duration; an 8-week randomized trial found HW significantly improved grip strength (p=0.032) versus a control group.
- Hang Endurance (HE): longer holds at lower loads targeting endurance; the same trial found HE did not produce a significant change versus control.
- Abrahangs: a roughly 10-minute low-intensity, long-duration protocol that produced strength gains comparable to maximal-load hangs, with a gentler tendon load.
Combining low-intensity and maximal protocols tends to work better than either alone. The same research on low-intensity loading found additive gains when climbers layered Abrahangs-style sessions with heavier max-hang work across a training cycle, likely because the two protocols drive different adaptations, muscular strength from heavy loading and tendon force transfer from frequent, gentle loading.
Progression rules to follow:
- Increase added weight only after you can complete every rep of a session with clean form and no pain.
- Add no more than 5% load or 1 to 2 seconds of hang time per week.
- Take a full rest day between finger-intensive sessions.
- Deload for a week every 4 to 6 weeks, or immediately if soreness lingers past 48 hours.
What Do 8 to 12 Week Grip Training Programs Look Like?
Programs should scale by training history, not ambition. A climber with under a year of consistent training needs a different loading curve than someone who has run hangboard blocks before.
| Level | Sessions/week | Primary protocol | Progression marker |
|---|---|---|---|
| Beginner | 2 | Bodyweight half-crimp hangs, 5 to 7 sec | Add 2 sec hang time every 2 weeks |
| Intermediate | 2 to 3 | Max Hangs + Abrahangs | Add 5% load every week |
| Advanced | 3 | HW protocol + campus, periodized | Add load weekly, deload every 4th week |
A typical session runs: 8 to 10 minutes warm-up, the primary hangboard set (3 to 6 reps with full rest between), 10 to 15 minutes of supplemental forearm or pulling work, then mobility and cooldown.
- Weeks 1 to 3: establish baseline load and hang time; test every session for form breakdown.
- Weeks 4 to 6: increase load or duration weekly, following the 5% rule.
- Weeks 7 to 8 (intermediate/advanced) or 7 to 12 (beginner): peak load, then deload the final week before retesting.
Which Warm-Up And Grip Exercises Actually Help?
A finger-specific warm-up prevents most avoidable strains. Run through shoulder circles, wrist circles, finger open-close reps, and two to three easy assisted dead hangs before any working set.
Core exercises worth building into a weekly routine:
- Dead hangs: bodyweight or assisted, the foundation of finger strength work.
- Repeaters: 7 seconds on, 3 seconds off, for 6 reps, builds endurance capacity.
- Weighted hangs: added load via belt or backpack once bodyweight hangs feel easy.
- Pinch holds: block or pinch-grip attachment, targets thumb opposition strength.
- Farmer carries: loaded walking holds that build grip endurance and forearm resilience.
- Wrist curls and eccentric finger extensions: balance the forearm flexors that dominate climbing training.
- Rice-bucket work: low-load, high-rep hand mobility for recovery days.
Regress any exercise by adding assistance (a resistance band or foot on a chair) and progress by adding weight or extending duration in small steps.
- Novice: bodyweight dead hangs, 3 sets of 5 to 7 seconds.
- Intermediate: added weight or single-hand variations.
- Advanced: reduced edge size or single-finger-pocket variations.
Strengthening wrist extensors and the small intrinsic hand muscles rounds out grip stability and reduces the odds of compensation injuries elsewhere in the forearm.
How Do You Prevent Finger Pulley Injuries?
Crimping puts pulleys under far more stress than any other grip position. The mechanics are specific: full crimp flexes the middle joint to roughly 90 degrees while hyperextending the fingertip joint, a combination that loads the A2, A3, and A4 pulleys more than any other hand position climbers use.
Prevention rules that hold up under scrutiny:
- Default to half-crimp and open-hand for training volume; save full crimp for occasional, deliberate exposure.
- Progress load gradually. A narrative review of climbing finger injuries links abrupt spikes in training intensity or volume to higher injury rates across skill levels.
- Include low-intensity, long-duration loading (Abrahangs-style) to build tendon resilience without heavy joint stress.
- Strengthen wrist extensors and intrinsic hand muscles, since weak stabilizers compromise grip control under load.
Stop immediately if you feel a sharp pop, sudden pain, or notice a finger bowing away from the bone (bowstringing). Get it imaged. Rehab should move through controlled isometric holds, then eccentric loading, then graduated hangs, with a retest against your baseline numbers before you clear yourself for full-intensity training again.
Pro Tip: If a session ever requires you to grip harder just to compensate for pain, stop that session. Pain-modified form is exactly how a strain becomes a tear.
What Does The Research Actually Support?
The evidence converges on a few clear points. Climbing-specific edge tests predict performance far better than general grip tests, so test on an edge, not a dynamometer alone. Half-crimp strength alone explains up to 58% of the variance in bouldering grade, which is why it earns priority in most programs, but full grip-type coverage still matters for injury resilience.
Low-intensity Abrahangs-style loading and maximal hang protocols both produce real strength gains, and stacking them tends to beat either approach alone. An 8-week progressive Hang Weight protocol produced a statistically significant strength gain over a control group, confirming that a properly loaded 8 to 10 week block is enough time to see measurable change, provided the load increases stay conservative.
How Does Nutrition Support Grip Strength Gains?
Tendon and muscle recovery both depend on adequate protein intake, generally cited in strength training literature around 1.6 to 2.2 grams per kilogram of body weight daily for athletes doing regular resistance work. Collagen and connective tissue repair also draw on vitamin C and consistent hydration, since dehydrated tendons handle load less predictably.
Sleep matters more for finger training than most climbers assume. Tendon remodeling happens during rest, not during the session itself, so a climber running a hangboard block on five hours of sleep is undermining the exact adaptation the training is meant to produce.
Timing carbohydrate and protein intake around sessions helps too. A meal with both roughly one to two hours before a hangboard session supports the working sets; a protein source within a couple of hours afterward supports recovery. Climbers running higher-frequency finger training should also watch total training load across disciplines, since a heavy lifting day and a heavy hangboard day stacked too close together compound tendon stress rather than building strength independently.
Rest days aren't optional in a grip-focused block. Finger flexor tendons recover more slowly than most muscle tissue, so a full 48 hours between finger-intensive sessions is a reasonable floor, not a suggestion.
A Note On Prioritizing Testing And Training
Test-driven, mixed-intensity training beats guesswork every time we've examined the evidence. Climbers who alternate low-intensity and maximal protocols, and who retest on a fixed schedule, adjust faster than those running the same block indefinitely. Use objective measurement, whether a standardized edge hang or a tool like the DEXDIA GX, to catch stalls and asymmetries before they become injuries.
Track Your Grip Progress With The DEXDIA GX
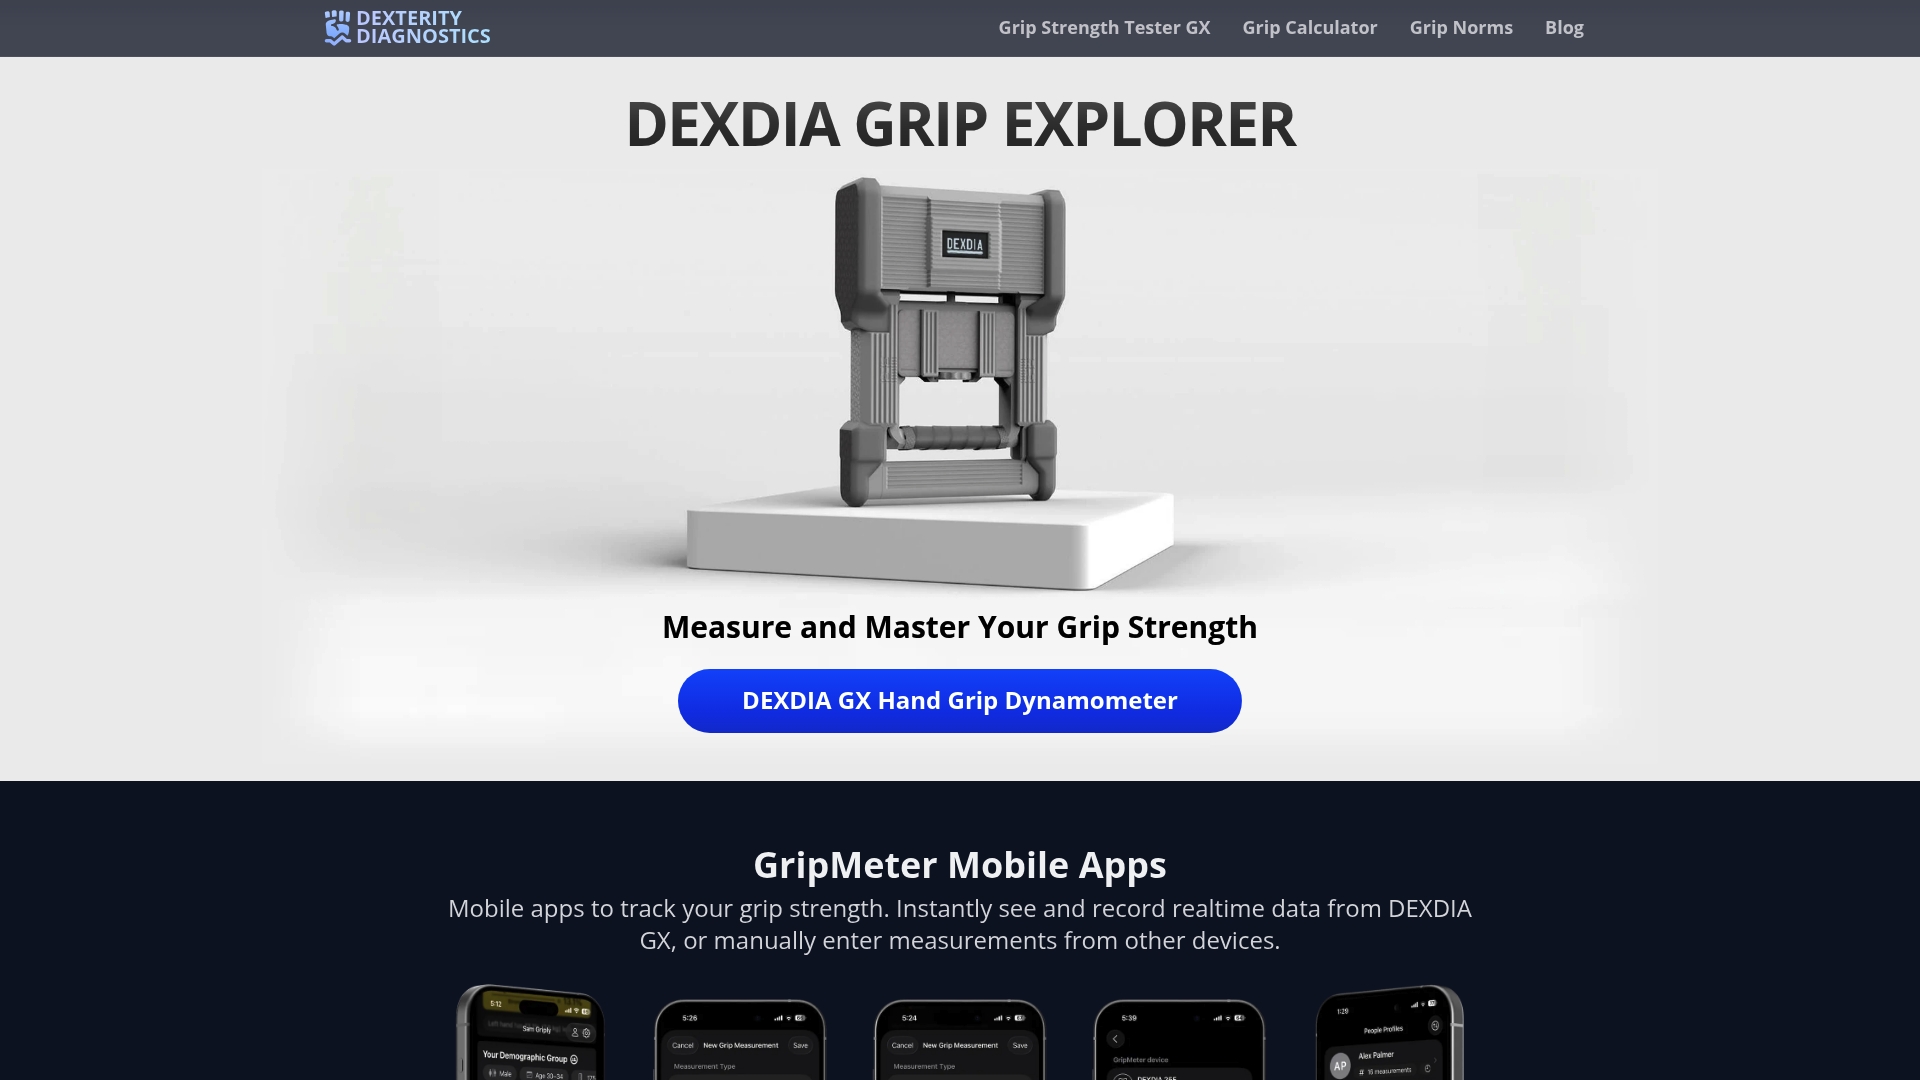
Every protocol in this guide depends on one thing: knowing whether your grip strength actually changed. The DEXDIA GX is a Bluetooth grip dynamometer built for exactly that job, giving climbers a fast, repeatable strength reading that syncs to a mobile app instead of a notebook full of guesses.
Use it to establish a baseline before your first hangboard block, track week-to-week changes alongside your edge-hang tests, and flag left/right asymmetries that a hangboard session alone won't reveal. The app compares your numbers against research-backed norms, so a reading of 45 kilograms means something concrete rather than an abstract number on a screen. Climbers returning from a pulley strain can use it to gate their return to training against an objective number instead of a feeling.
Pair it with the climbing-specific edge tests from this guide, run your numbers through the grip strength calculator to see where you stand, and order a DEXDIA GX to start tracking your next training block with real data.
Selected Research And Practical Reading
- Climbing-specific finger strength and performance: correlation data linking edge tests to bouldering and redpoint results.
- Six-grip isometric testing study: variance explained by half-crimp and combined grip tests.
- Abrahangs loading study: low-intensity versus maximal protocol comparison.
- 8-week hangboard RCT: randomized trial results for Hang Weight and Hang Endurance protocols.
- Finger pulley injury mechanics: clinical review of crimp-related pulley injuries.
Frequently Asked Questions
How long does it take to improve climbing grip strength? Measurable gains typically show up within 8 to 10 weeks of consistent, progressive hangboard training, based on results from a 10-week hangboard trial that found improvements in force metrics among climbers who added structured hangboard work to their normal climbing.
Is hangboarding necessary, or does climbing alone build enough grip strength? Climbing alone builds skill and endurance, but hangboarding adds a targeted strength stimulus that climbing volume rarely replicates on its own, particularly for maximal finger strength.
What edge size should I use to test climbing grip strength? A 20mm to 23mm edge is standard for climbing-specific testing, since it isolates finger flexor strength in a position that closely matches real climbing holds.
Can I train full crimp safely? Yes, in limited volume. Build a base of half-crimp and open-hand strength first, then add full crimp sparingly, since it places the highest load on the A2 through A4 finger pulleys.
How often should I test my grip strength during a training block? Every 3 to 4 weeks on the same edge, same grip type, and same time of day gives a reliable comparison and keeps training decisions based on data rather than feel.
Sources
- Climbing performance in males: the importance of climbing-specific finger strength
- Validity and Reliability of Finger-Strength Testing in 6 Common Grip Techniques for the Assessment of Bouldering Ability in Men
- Effects of Different Loading Programs on Finger Strength in Rock Climbers | Sports Medicine - Open
- Hangboard training study (8-week randomized trial)
- Finger pulley injuries in rock climbers: mechanisms and clinical review